A powdery film on your siding does not automatically mean you need new panels. Cleaning can improve the appearance, although permanent fading may remain.
Before treating oxidation on vinyl siding, check whether the surface is sound and identify what is coming off. Start with a small test area. The dry result will help you decide whether cleaning is enough.
What causes oxidized and chalky vinyl siding?
Vinyl panels contain PVC, pigments, and additives that help them withstand outdoor exposure. Sunlight and weather gradually affect the exposed surface, sometimes leaving loose particles that rub off as powder.
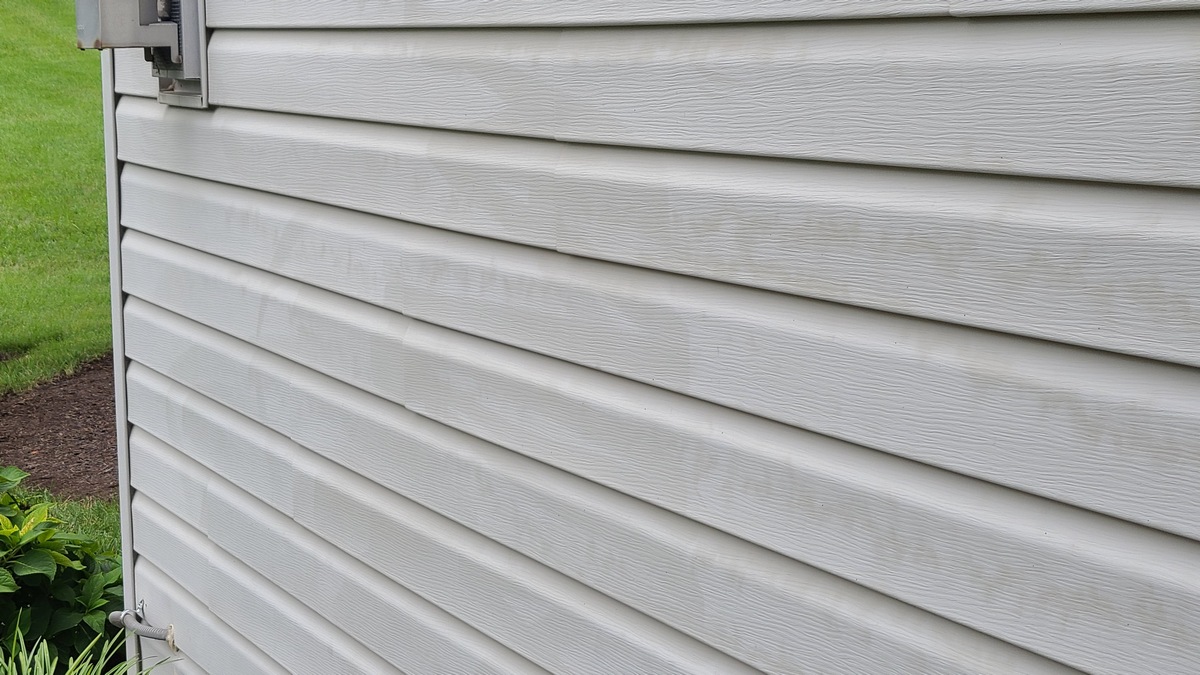
The visible chalk on weathered panels is a symptom of surface degradation. It can be white or tinted by the panel’s color. Exposure varies around a house, so some walls may look dull while sheltered areas retain more color.
Chalking and fading are different
The powder on chalky vinyl siding can often be washed away, revealing a cleaner surface underneath. Fading involves a lasting color change that washing cannot necessarily correct. Both conditions can occur on the same panel.
Cleaning also cannot replace degraded material or restore the original supply of protective additives. Judge success by reduced residue and a more even appearance. Expecting every wall to match a spare panel stored indoors can lead to unnecessary scrubbing.
How to tell oxidation from dirt, algae, or mildew
Inspect several dry areas before choosing a cleaner. Compare a sunny wall with a shaded section, and note whether the residue is powdery, greasy, or attached in patches.
Use these clues together because weathering and ordinary grime can overlap:
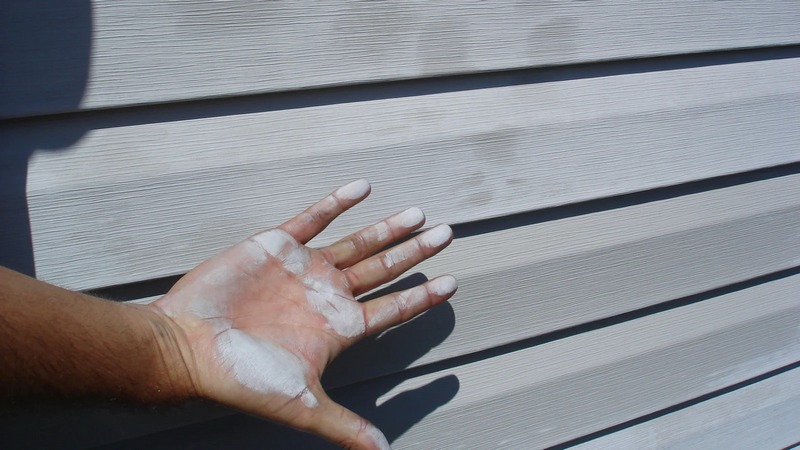
- Powder transfer: Wipe a dry panel gently with a clean, dark cloth. A pale, dusty deposit suggests chalking, although construction dust can look similar.
- Dirt patterns: Look for brown splash marks near the ground or streaks below gutters. These often follow runoff or nearby soil disturbance.
- Biological staining: Green patches or dark speckles may indicate algae or mildew, particularly where surfaces stay damp. Color alone cannot identify the growth conclusively.
- Surface condition: Check for splits, loose sections, distortion, and flaking coatings. Previously painted panels need cleaning methods compatible with that paint.
Accurate diagnosis makes vinyl siding oxidation removal more predictable. If mild washing removes grime but dry powder remains, further treatment may help. If the wall stays pale without leaving residue, additional cleaner may offer little benefit.
A wetting test can show how much surface appearance changes with moisture, but it does not prove the cause. Water can temporarily darken weathered surfaces and hide fine texture. Wait until the area dries before comparing it with adjacent panels or deciding that a cleaning treatment has restored the color.
Photograph the wall before starting. Use similar lighting when comparing the result, since wet panels and changing shadows can make the color look deeper than it really is.
How to remove oxidation from vinyl siding
Begin with the siding manufacturer’s care instructions and identify any restrictions on cleaners or equipment. If the brand is unknown, ask a siding professional before applying a strong restoration product.
Learning how to remove oxidation from vinyl siding starts with a controlled test, followed by gentle washing and careful rinsing. There is no universal chemical recipe or dwell time. The suitable method depends on the panel, its condition, and the selected cleaner.
Gather supplies and inspect access
Choose a cool, shaded work area where you can rinse promptly. Postpone cleaning if wind carries spray onto neighboring property or if the wall is too hot for the product’s instructions.
Gather the equipment before mixing anything:
- Cleaning tools: Use a soft bristle brush, a bucket, and clean cloths.
- Water supply: Connect a garden hose with an adjustable nozzle.
- Personal protection: Wear the gloves and eye protection specified on the label. Choose footwear that grips wet ground.
Choose a cleaner according to the residue and the siding manufacturer’s instructions. These categories serve different purposes and are not interchangeable:
- Commercial butyl-based siding cleaners specifically labeled for vinyl siding.
- Trisodium phosphate (TSP) substitutes can support surface preparation.
- Dedicated exterior restoration washes: Oxidation removers such as Cleansol BC target chalking and accumulated soil. Cleansol BC is restricted to professional use, so homeowners should select an appropriate consumer product or hire a qualified cleaner.
Do not stretch sideways from a ladder while holding a hose or brush. Arrange professional help when upper walls cannot be reached safely. Difficulty reaching an area is not a reason to increase spray pressure.
Protect windows, fixtures, and plants
Close windows and doors, then move furniture and portable equipment away from the wall. Inspect window edges and penetrations for obvious openings before wetting nearby panels. Address visible damage first.
Follow the cleaner’s instructions for shielding plants and nearby finishes. Prewetting and rinsing vegetation may be required, but these measures do not make every chemical harmless. Protect painted metal, glass, and other surfaces when the label calls for it.
Keep spray away from outlets, lights, vents, and electrical equipment. Plan where runoff will travel, particularly near ponds or storm drains. Keep children and pets outside the working area until cleanup is complete.
Test a small section
Choose an inconspicuous patch that represents the weathered surface. A sheltered spot with no chalk may not show how the cleaner will behave on the rest of the wall.
Use this sequence before committing to a larger area:
- Prepare: Measure the product and water according to the label. Use clean equipment without residue from another chemical.
- Apply: Treat the patch with the specified tool and contact time. Keep the solution from drying if the instructions require a wet surface.
- Rinse: Remove the cleaner thoroughly with gentle water flow. Avoid forcing water into joints or openings.
- Evaluate: Let the patch dry completely and check its color, sheen, and texture. Compare it with the untreated area beside it.
For homeowners deciding how to clean oxidized vinyl siding, this trial is more useful than choosing the strongest bottle available. Stop if the surface becomes tacky, blotchy, or visibly altered. A cleaner that works on a neighbor’s house may not suit your panels.
Wash manageable sections
Begin with the mildest approved method that performed well in the test. Soapy water and gentle brushing may remove loose chalk along with ordinary dirt. Persistent deposits may require a product specifically labeled for the material and condition.
Apply the solution in small sections you can finish before it dries. Follow the label’s application direction; many siding care instructions recommend washing from the bottom upward to reduce streaking.
When removing oxidation from vinyl siding, use consistent coverage and light agitation. Move the brush along the panel texture without grinding it into the surface. Rinse grit out of the bristles regularly. Replace worn brushes before exposed edges scratch the siding.
Do not assume every cleaner needs 5 or 10 min of contact. Use the specified dwell time and watch the surface throughout. If drying becomes difficult to prevent, reduce the work area or wait for cooler conditions.
Rinse before residue dries
Rinse the completed section from the top downward, carrying loosened material off the wall. Keep the spray directed at the panel face or downward. Avoid spraying upward beneath overlapping edges.
Pay attention to textured areas where suds or powder can remain. Rinse nearby surfaces exposed to drips as the product instructions require. Avoid prolonged spraying around window openings and ventilated trim.
Check your work periodically from indoors if water intrusion is a concern. Stop immediately if water appears inside. Resolve the entry point before continuing exterior washing.
Assess the dry finish
Let the wall dry fully before deciding whether another pass is worthwhile. Wipe a representative area with a clean cloth and compare its appearance with your original photograph.
For sound panels, the best way to remove oxidation from vinyl siding is the least aggressive compatible method that achieves an acceptable dry result. A remaining color difference does not automatically mean more chalk needs removal. Repeated scrubbing can create uneven sheen without correcting faded pigment.
If the result remains patchy, ask a professional to assess the surface before escalating treatment. Request a demonstration area and agree on the expected dry appearance. Keep photographs and product details if you may contact the siding manufacturer about a warranty concern.
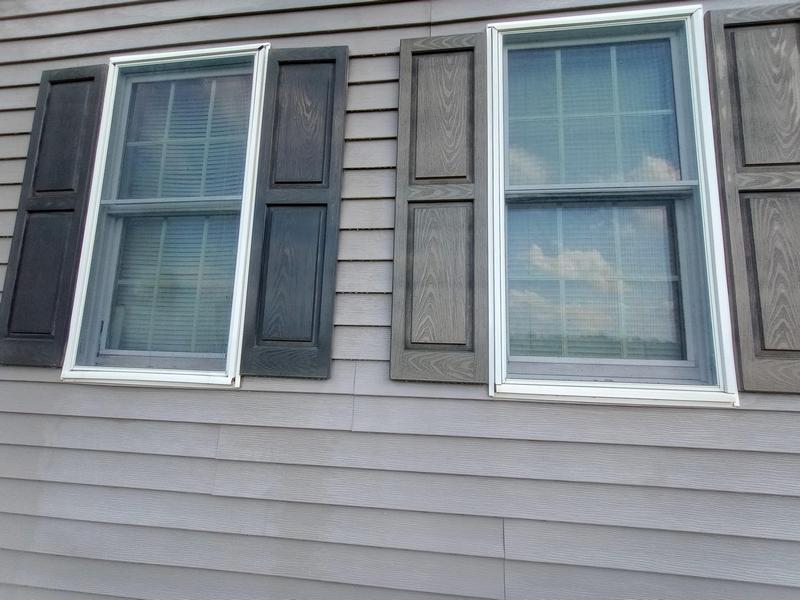
Common mistakes to avoid when cleaning oxidized siding
Cleaning errors often become visible only after a wall dries. Preventing them is easier than blending a scratched patch or correcting chemical discoloration.
Avoid these shortcuts:
- Excess pressure: Do not use a pressure washer as the default solution. Manufacturer guidance varies, and improper spraying can damage panels or drive water behind them.
- Abrasive tools: Skip wire brushes, steel wool, and scouring pads. Hard scrubbing can scratch the texture or create shiny patches.
- Unapproved chemicals: Avoid strong solvents and improvised mixtures. Never mix bleach with acids, ammonia, or other cleaners.
- Stronger dilution: Do not add extra concentrate to speed up the job. Follow the stated limits and repeat treatment only when permitted.
- Drying cleaner: Avoid hot walls and oversized work sections. Residue left to dry can cause streaking or staining.
A product sold for rust, masonry, or metal oxidation is not automatically suitable for PVC. Read the approved surfaces and exclusions before buying. If the instructions do not address your siding, ask the manufacturer instead of guessing.
Aftercare and prevention
After cleaning [oxidized vinyl siding], wash as recommended by the siding manufacturer, often annually, and inspect areas sheltered from rain. Routine cleaning controls accumulated grime. It cannot stop sunlight from aging the surface or guarantee that chalk will never return.
Reduce avoidable exposure
Trim vegetation that rubs against panels and correct sprinkler spray hitting the wall. Clear blocked gutters so dirty water does not repeatedly overflow onto the same section. These measures reduce staining and keep problems easier to spot.
Keep grills and other heat sources at the clearances specified by their manufacturers. Check exposed walls for distortion after nearby heat events. Cleaning will not straighten warped plastic.
Decide whether coating or replacement makes sense
Record the cleaner, dilution, and treated areas to track recurring stains and weathering.
Apply a restoration coating only with manufacturer approval. Check its maintenance requirements and warranty implications.
Sound panels may be painted after removing loose chalk. Use an approved paint and color, since unsuitable darker shades can increase heat absorption.
Have cracked, brittle, or distorted panels assessed professionally. If replacement is appropriate, contact Columbia Windows to discuss siding options and request an estimate.